Snapshot News

This is a source for Reviews of the latest and greatest in 35mm SLR camera equipment as well as a place to come and learn the professional secrets to taking better pictures. You'll learn which equipment is the best for you budget, as well as how to use the equipment that you have to take better pictures than you ever thought possible. I look forward to working alongside you and answering any questions that you may have.

My Photo
Name:
Location: California, United States

I am always willing to put in the extra time to accomplish a task so that it can be the best. I was born in Whittier, California (just East of L.A.) and I am a purebread Californian through and through. I am passionate about life and making it exciting, vivid, and fun, but with a purpose. I graduated from LU with a major in Graphic Design

Monday, October 17, 2005

Tips for Capturing Autumn Scenic Images

Fall is one of the prettiest times of the year to take photos, with Halloween and Thanksgiving decorations about and the leaves showing us their magnificent shades of reds and yellows. Whether you are a pro or an amateur, this yearly display of splendor is sure to inspire the inner photographer in any of us.
This time of the year almost hands us beautiful pictures where ever we look, but you want to plan out your shoot. Here are a few tips that will help you capture these wonderful scenes:


Aim for the "magic hours"
Anytime of the day you’ll find great pictures of the fall foliage, but try to take photos in the early morning or late evening. You may have heard the term "magic hour" in photography, which refers to the hour after sunrise and the hour before sunset. Though it's not written in stone that you’ll get the best photos at these times, you are likely to get some great lighting.


Think big and small
Don’t spend all of your time shooting big broad landscapes. While those make nice images, remember to take pictures of the little things, too. A thousand red and yellow leaves do look pretty but, like people, each is unique and deserves a close-up.


Move around
Composition is always important in photography, and shooting fall pictures is no exception. I know there are times when that perfect picture just jumps out at you, especially when you’re driving up 95 or one of the other interstates through New England during peak foliage. There have been times I’ve just wanted to slam on the brakes and snap a few pictures. Remember to try different angles. There are a thousand possibilities, not just at a height of 6 feet and straight on. It's amazing how a subject can change by just moving a foot or two in any direction.


Take some time
If you are traveling to a popular fall foliage destination, give yourself plenty of time. If possible, try to stay a few days at your destination so you can really check things out. Get off the beaten path a little bit and get things the average tourists doesn’t see. There might be a beautiful lake or a pumpkin patch down that next dirt road. Do a little exploring and see where the day takes you.


Now go and capture how beautiful fall can be!
~CH

Saturday, October 08, 2005

Quick Tips For Better Portraits

Yes, you can use your camera to take your own portraits and glamour photos. There are key tips to make the session successful, and enjoyable for both photographer and model. Find out how to take great portraits, and glamour photos.
Taking pictures of people, in my opinion, is one of the hardest subjects in photography. Most of the time you’re not just a photographer, but also a director for subject placement and sometimes a psychologist by keeping your subject(s) happy.

Set the stage
There's no need to worry if you don’t have a state of the art studio, many of us don’t. A homemade studio can be put together relatively cheap nowadays, and that’s really if you want a studio where you have control over everything! A lot of nice portraits are done outside or on location. You can find backdrops that you could never get in a studio.

That special place
Everyone seems to have a little place they love to go to. If the model you’re working with does, then that can work to your advantage. Keeping your model happy and relaxed reflects in your photographs.

Watch your back
Simplify the photo. Keep the focus of your photograph on the subject. Get rid of the clutter in the background either by removing it or keeping it out of focus. Backgrounds have a major effect on your portraits. There are no definite dos and don’ts, but that fair skinned blonde might stand out more against a dark background than a lighter one.

Choose the right position
Your camera positioning can have a strong impact on your subject and overall theme of the portrait. Using eye level height is where you should always start. Shooting your subject from a lower height will give your subject a more “I’m in charge” look.

The eyes have it
Where do you want to focus? This is a question I get asked a lot and the plain and simple answer is the eyes, always the eyes. You get those eyes focused, then everything else just comes together. Using the subjects eyes can give your model different expressions.

See the light
The lighting you choose will also have a major factor in your photo. The lighting in your photograph can give you the mood you want or take it away if its not set up correctly. Lighting can make that beautiful swan look like an ugly duckling and vice versa, and lighting is something that will change from person to person. You should be prepared to constantly examine and adjust the lighting!

Stay Classy!

~CH

Tuesday, October 04, 2005

The Canon Elan 7ne Will Catch Your Eye


With the fastest autofocus in its class, it's never been so easy to achieve perfect focus so quickly. The ELAN 7ne have the fastest AF ever in an ELAN-series camera. Whether your subjects are moving or stationary. The ELAN 7ne offers class-leading AF that rivals the focus speed of top-of-the-line pro SLRs.

With AI Servo, One Shot and AI Focus modes, the AF system can adapt to any situation. AI Servo AF is perfect for moving subjects. The camera follows the subject continuously until the shutter is released, continuously adjusting focus for sharp results.

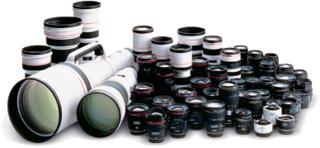
The ELAN 7ne is compatible with over 50 Canon EF lenses, the choice of professionals and hobbyists worldwide, Canon EF Lenses are masterpieces of innovative design and superior optics. Canon's advanced research and engineering places EF Lenses in a class by themselves. Unsurpassed in value and quality, there are more than 50 EF Lenses compatible with the EOS ELAN 7ne.

The ELAN 7ne has more focusing points and greater off-center focusing coverage than any other camera in its class. Focusing point selection keys make manual selection of focus points effortless, and focus points are clearly displayed in the camera's viewfinder. Built-in Dioptric adjustment corrects for the user's vision, and allows for easy shooting with or without glasses.
Eye Control

Use the ELAN 7ne's exclusive Eye Controlled Focus™ for instant, intuitive AF in almost any situation. The Eye Controlled Focus System tracks the glance of the eye, integrating composition and focus into one uninterrupted step. Canon's fastest Eye Control system to date, it works whether the camera is oriented horizontally or vertically.

This camera is a part of my personal collection, and I could not recommend it more highly, it's an incredible product that Canon has put a lot of thought and research into. If you have the change, and would like some more information, feel free to find out for yourself. You can also ask me if you have any questions for a very satisfied customer.
You stay classy,
~CH

Capture the Sunset of Your Dreams


Have you ever been disappointed with your sunset photos? Do they lack color, drama, and impact? If so, here are my quick tips for turning sunset snapshots into great shots!

Timing. You’ll get the most spectacular colors just when the sun kisses the horizon and after it has finished its kiss. That’s not to say that you can’t get great shots before and after those magic moments. Therefore, be prepared--with plenty of film and lots of time--to capture the ever-changing colors in the sky, which can change from second to second.

Composition. Ye old saying: “Dead center is deadly.” In photo terms, this means: Don’t put the sun in the dead center of the frame! Rather, place it off-center. This technique, effective for most subjects, draws the viewer into the scene by forcing him or her to look around the frame.

And speaking of deadly, don’t place the horizon in the dead center of the frame. Place it low in the frame when the sky has lots of color, and high in the frame when the foreground is interesting, as is often the case when photographing sunsets over water.

Foreground Elements. A sky filled with spectacular colors is a great photographic subject. But place a dramatic foreground element in the scene, and you have a knockout photo. Trees and buildings are great sunset foreground elements, so are people and animals.

Lenses. Photograph a sunset with a 24mm or 35mm lens and the sun will look like a pea in your picture. That may be okay, if the sky and foreground are interesting. Use a telephoto lens in the 300-600mm range and the sun will look like a huge ball in your picture. A dramatic effect, indeed.

Accessories. A tripod will come in handy after the sun has set--when you want to get those low-light shots of a pastel-colored sky--pictures that required shooting at slow shutter speeds.

Red, yellow, and orange filters can help with dull sunsets, but I don’t recommend them for naturally great sunsets. These filters tend to make the scene look too artificial.
Gradual filters can help improve sunset photos. These filters are dark on the top and clear on the bottom (held in one position) and smooth out the contrast range between a bright sky and dark foreground. These filters are available in several different densities, allowing you to match the bright and dark areas of a scene for picture-perfect results.

Film. (If you're not shooting Digital) I photograph sunsets with two films: Kodak Extra Color 100 for before the sun has officially set, and Kodak Elite Chrome 200 for those twilight shots. And I take more film than I think I need, several rolls of each. With ISO 100 and 200 films, I’m prepared to take pictures of the entire sunset sequence, only one of which, I’ve learned from experience, is the one I really like.

Exposure. I shoot digital with my Canon EOS D30. To ensure a good exposure, I take a reading of the brightest area of the scene and shoot at that setting. Then I take exposures at one-half stop and one stop under that setting (for a total of three exposures). The underexposed pictures have more saturated colors, and I sometimes prefer these shots over the “correctly” exposed ones.

If you shoot negatives, I recommend setting your camera on automatic. Take your shot. Then set your ISO dial to twice the ISO setting (ISO 100>200, for example) and shoot again. If your pictures are too dark or too light, or lack brilliant colors, take ’em back to your photofinisher and ask for a redo. Because negatives have a wide exposure latitude, you should be able to get a print you like.

Have Fun. Please don’t get too caught up in the technical aspects of sunset shooting. After all, you’re there to have fun! So enjoy the moment. And if your shot does not turn out the way you saw it in your “mind’s eye,” remember that you can use Photoshop or other imaging programs to enhance the colors, contrast, and exposure of your scene.
Good luck! I hope you see improvement and feel free to ask any questions!
You stay classy...
~CH